The first step towards visually supported annotation with HDR…
… serves as another use case for HDR.
Example
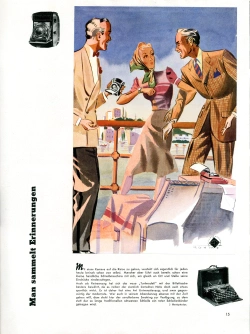
To advertise my other blogs, here is a post from the Blaufußtölpel fashion blog: The Men’s Journal July 1934
Realisation
Ultralytics enables image segmentation here (with Python). It is a very easy-to-use framework with pre-trained models, and of course it also allows you to train your own models…
Basically, all you need to do is pick up bits and pieces from the documentation:
import os
import numpy as np
from PIL import Image
from jxlpy import JXLImagePlugin
import cv2

from ultralytics import YOLO

image_path = "images/page015.jxl"

# Load model beforehand and place in the correct directory
model_path = "./models/yolo11x-seg.pt"
model = YOLO(model_path)

image = Image.open(image_path)
results = model(image, verbose=False)
np_image = cv2.cvtColor(np.array(image), cv2.COLOR_RGB2BGR)
w, h = image.size

for result in results:
    names = result.names
    boxes = result.boxes
    masks = result.masks
    if masks is None:
        continue
    for seg, box in zip(masks.data.cpu().numpy(), boxes):
        t = names[int(box.cls)]
        seg = cv2.resize(seg, (w, h))
And now you have (with seg) a NumPy array that contains the mask in the dimensions of the input image. This can then be used to perform further image operations…
The following Python modules must be installed:
pip install jxlpy
pip install ultralytics
pip install opencv-python
Whereby jxlpy is not necessary if you do not use JXL images.
The models can either be downloaded and integrated directly, e.g. to work with them directly, as in the example, or via a corresponding configuration. Details can be found in the linked documentation.
Result
The image shows the outline of the woman in the centre (class ‘person’) highlighted.
The result so far can certainly be optimised in terms of the accuracy of the segmentation.
Attention: HDR view after clicking on the preview image, approx. 2MB in size.
